
Matter.js
Matter.js는 웹 기반 2D 물리 엔진으로, 웹 페이지나 웹 애플리케이션에서 간단한 물리 시뮬레이션을 구현하는 데 사용된다.이 엔진은 HTML5 Canvas를 기반으로 하며, 자바스크립트로 작성되어 있다. Matter.js를 사용하면 물리적인 특성을 가진 객체들을 생성하고, 그들 간의 상호작용을 구현하여 현실적인 움직임 및 충돌 효과를 만들 수 있다.
물리엔진? 그게 뭔데 ㅠㅠ
정말 처음보는 거라 먼소린지 모르겠고,.. 공식 문서도 참 불친절하구,,,,,,,,,,,,
기본 효과같은 건 구글링이나 공식문서를 보면 충분히 활용 가능하지만
저 ... path지정방법과 스크롤 이펙트가 어렵다.
그래서 오늘은 예제 코드를 뜯어보면서 사용법을 익혀볼 생각이다.(코드펜 예제를 바탕으로 주석 설명을 달았다.)
Matter.js 공식 문서
Matter.js
Matter.js is 2D rigid body physics engine for the web, using JavaScript and HTML5
brm.io
코드펜 참조
https://codepen.io/Marco-Ahlers/pen/PoxrEzm
Animation
...
codepen.io
완성된 사이트는 요기!
https://jjul-gsap-test-01.netlify.app/test03
Physics-based Falling Animation
jjul-gsap-test-01.netlify.app
html 구조
<div id="container"></div>
안믿기겠지만 이게 끝.ㅋㅋㅋㅋ
body 안에 container라는 id를 가진 div요소를 넣어준다.
css
body {
    margin: 0;
    overflow: hidden;
    display: flex;
    align-items: center;
    justify-content: center;
    background-color: #eee7e0;
    width: 100vw;
    height: 100vh;
  }

  #container {
    width: 100vw;
    height: 100vh;
  }

  svg {
    display: none;
  }
기본적인 body와 container 스타일링이다.
cdn 주소
<!-- path cdn -->
<script src="https://cdn.jsdelivr.net/npm/pathseg@1.2.1/pathseg.js"></script>
<script src="https://cdn.jsdelivr.net/npm/poly-decomp@0.3.0/build/decomp.min.js"></script>

<!-- matter.js cdn -->
<script src="https://cdnjs.cloudflare.com/ajax/libs/matter-js/0.17.1/matter.js"></script>
matter-js 주소와 나머진 path 관련된 cdn같다.
참고로 matter.js의 최신 버전은 0.19.0이다. (예제에선 더 낮은 버전을 사용.)
스크립트: 초기설정
// 📕--- 초기 세팅 ---
  const Engine = Matter.Engine,
    World = Matter.World,
    Bodies = Matter.Bodies;
  Body = Matter.Body;
  Composites = Matter.Composites;
  Common = Matter.Common;
  Vertices = Matter.Vertices;
  Svg = Matter.Svg;
  Composite = Matter.Composite;
  // --- 초기 세팅 ---
Matter.js를 쓰려면 먼저 초기 설정을 해주어야한다. 공식 문서에서 내가 원하는 효과를 찾아 github 리드미 파일에 코드가 다 나와있다.
요런식으로
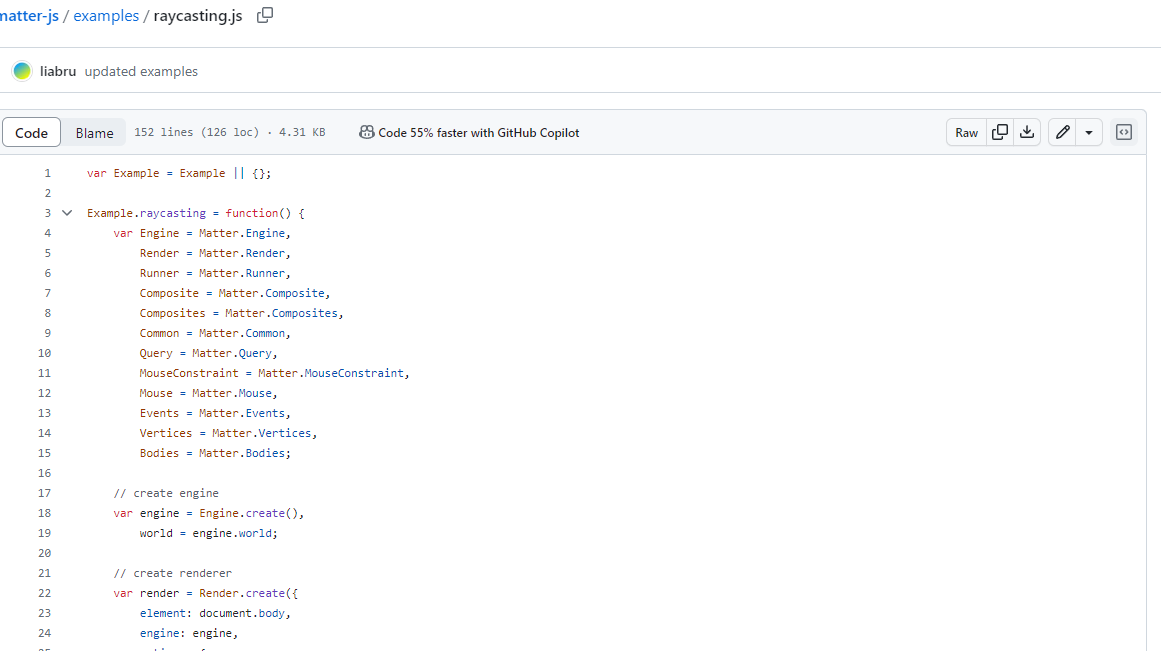
원하는 효과가 있을 땐 공식 문서를 잘 살펴보고 적용해보자.
내가 봤을 때 이 예제는 concave라는 효과를 사용한 거 같다
https://github.com/liabru/matter-js/blob/master/examples/concave.js
물리엔진 생성 후 렌더링
// 📕Engine.create() 함수를 사용하여 Matter.js 엔진을 생성한다.
const engine = Engine.create();
// 📕렌더링할 컨테이너 역할 부분의 id를 가져온다.(getElementById)
const container = document.getElementById("container");

// 📕Matter.Render.create() 함수를 사용하여 시각적인 렌더링을 담당하는 객체를 생성한다.
const renderer = Matter.Render.create({
element: container, // 렌더러가 그릴 HTML요소를 지정해준다.
engine: engine, // 렌더러에 사용될 Matter.js 엔진을 지정해준다.
options: {
  // 커스텀 옵션들을 설정해준다.
  width: container.offsetWidth,
  height: container.offsetHeight,
  wireframes: false, //wireframe 여부
  background: "#eee7e0",
},
});
벽 설정
// 📕경계 벽 생성하는 부분 (순서대로 왼쪽, 오른쪽, 아래이다. isStatic은 바디를 정적으로 만들어 물리 시뮬레이션에 영향을 주지 않도록 한다.)
// 🧐 여기선 왜 위쪽 벽을 설정하지 않았을까? -> 떨어지는 효과를 나타내야하기 때문이다.
const walls = [
    Bodies.rectangle(0, 0, 1, container.offsetHeight * 2, {
      isStatic: true,
    }),
    Bodies.rectangle(
      container.offsetWidth,
      0,
      1,
      container.offsetHeight * 2,
      { isStatic: true }
    ),
    Bodies.rectangle(
      0,
      container.offsetHeight,
      container.offsetWidth * 2,
      1,
      { isStatic: true }
    ),
];
물리 설정
// 📕물리적 특성을 설정하는 객체인 physics를 정의한다.
const physics = {
  restitution: 0.7, // 복원력 또는 탄성력 (0~1 사이에 지정해줌. 1에 가까워질 수록 충돌 후 빠르게 원래 형태로 돌아간다.)
  friction: 0.4, // 마찰 계수 (0~1 사이에 지정해줌. 1에 가까워질 수록 강한 마찰이 발생한다.)
};
svg 모양 설정
// 도넛모양 생성하는 부분인 듯!
const createCircle = (width, color, x, y) => {
    const outerCircle = Bodies.circle(x, y, width, {
      ...physics,
      render: {
        fillStyle: color,
      },
    });
    const innerCircle = Bodies.circle(x, y, width / 2.5, {
      ...physics,
      render: {
        fillStyle: "#eee7e0",
      },
    });

    return Body.create({
      parts: [outerCircle, innerCircle],
    });
};

// 소세지모양 생성하는 부분인듯!
const createSvgElement = (path, color, scale, x, y, angle) => {
    pathElement = document.createElementNS(
      "http://www.w3.org/2000/svg",
      "path"
    );
	pathElement.setAttribute("d", path);
	const vertices = Svg.pathToVertices(pathElement, 3);
	vertices.forEach((vertical) => {
          const i = vertices.findIndex(
            (v) => v.x === vertical.x && v.y === vertical.y
          );

          if (i !== -1) {
            vertices.splice(i, 1);
        }
    });
    const body = Bodies.fromVertices(
      x,
      y,
      vertices,
      {
        ...physics,
        render: {
          fillStyle: color,
          strokeStyle: color,
          lineWidth: "1px",
        },
      },
      true
    );

	Body.scale(body, 1, 1);
	Body.setAngle(body, angle);

	return body;
};

// 모양 생성하는 함수를 바탕으로 요소들을 생성해주는 부분인듯

const elements = [
    createSvgElement(curved, "#583d91", 1, 250, -400, 30),
    createSvgElement(reactangle, "#eb5c48", 1, 450, -400, 50),
    createCircle(115, "#9a3d90", 500, -400),
    createSvgElement(curved, "#583d91", 1, 700, -400, 50),
    createCircle(135, "#eb5c48", 1150, -200),
    createSvgElement(curved, "#583d91", 1, 1460, -400, 200),

    createSvgElement(curved, "#583d91", 1, 1300, -700, 300),
    createSvgElement(reactangle, "#fab71a", 1, 1600, -700, 100),

    createCircle(115, "#fab71a", 100, -900),
    createSvgElement(curved, "#eb5c48", 1, 250, -900, 250),
    createCircle(135, "#fab71a", 600, -900),
    createSvgElement(curved, "#eb5c48", 1, 1500, -900, 100),
];
마우스 감지 이벤트
// 📕MouseConstraint은 마우스 입력을 기반으로 물리 시뮬레이션에 영향을 주는 제약(Constraint)을 제공한다.
const mouseConstraint = Matter.MouseConstraint.create(engine, {
    element: container,
    constraint: {
      stiffness: 0.2, // 제어의 강도 또는 강성(stiffness)을 나타내는 값 (낮을수록 유연)
      render: {
        visible: false, // 제어 요소(마우스)의 가시성 여부
      },
    },
});
물리엔진 world에 추가 후 렌더링하기
// 📕World.add()로 물리 엔진 세계에 다양한 물체들을 추가(배열 안에 설정해놓은 변수들을 펼침연산자로 추가한다.)
World.add(engine.world, [...walls, mouseConstraint, ...elements]);
// 📕Engine.run()로 Matter.js 엔진을 실행
Engine.run(engine);

// 📕Render.run()호출하여 렌더러 실행
Matter.Render.run(renderer);
거의 웬만한 설명은 주석에 달아놓았으므로 궁금한 부분은 gpt 찬스 쓰시면 될 듯 싶슴당. (귀찮아서 그런거 아님)
전체 코드
<!DOCTYPE html>
<html lang="en">
  <head>
    <meta charset="UTF-8" />
    <meta name="viewport" content="width=device-width, initial-scale=1.0" />
    <title>Physics-based Falling Animation</title>
    <style>
      body {
        margin: 0;
        overflow: hidden;
        display: flex;
        align-items: center;
        justify-content: center;
        background-color: #eee7e0;
        width: 100vw;
        height: 100vh;
      }

      #container {
        width: 100vw;
        height: 100vh;
      }

      svg {
        display: none;
      }
    </style>
  </head>

  <body>
    <div id="container"></div>

    <!-- path cdn -->
    <script src="https://cdn.jsdelivr.net/npm/pathseg@1.2.1/pathseg.js"></script>
    <script src="https://cdn.jsdelivr.net/npm/poly-decomp@0.3.0/build/decomp.min.js"></script>

    <!-- matter.js cdn -->
    <script src="https://cdnjs.cloudflare.com/ajax/libs/matter-js/0.17.1/matter.js"></script>
    <script>
      // 📕보통 matter.js에서 패스를 지정할 때 쓴다.
      const reactangle =
        "m.26,274.72c-1.79-20.16,5.77-40.86,22.2-55.17L256.07,16.09c27.25-23.73,68.58-20.88,92.31,6.37,23.73,27.25,20.88,68.58-6.37,92.31l-233.61,203.46c-27.25,23.73-68.58,20.88-92.31-6.37-9.42-10.82-14.66-23.86-15.83-37.14Z";
      const curved =
        "m341.46,31.89c14.51,28.65,3.05,63.65-25.6,78.16-3.42,1.73-34.78,17.16-83.49,26.15-28.57,5.27-57.68,7.34-86.51,6.14-36.13-1.5-71.89-8.14-106.28-19.74C9.15,112.33-7.2,79.34,3.07,48.9,13.33,18.47,46.33,2.12,76.77,12.39c101.89,34.37,185.72-5.68,186.54-6.1,28.65-14.51,63.65-3.05,78.16,25.6Z";

      // 📕--- 초기 세팅 ---
      const Engine = Matter.Engine,
        World = Matter.World,
        Bodies = Matter.Bodies;
      Body = Matter.Body;
      Composites = Matter.Composites;
      Common = Matter.Common;
      Vertices = Matter.Vertices;
      Svg = Matter.Svg;
      Composite = Matter.Composite;
      // --- 초기 세팅 ---

      // 📕Engine.create() 함수를 사용하여 Matter.js 엔진을 생성한다.
      const engine = Engine.create();
      // 📕렌더링할 컨테이너 역할 부분의 id를 가져온다.(getElementById)
      const container = document.getElementById("container");

      // 📕Matter.Render.create() 함수를 사용하여 시각적인 렌더링을 담당하는 객체를 생성한다.
      const renderer = Matter.Render.create({
        element: container, // 렌더러가 그릴 HTML요소를 지정해준다.
        engine: engine, // 렌더러에 사용될 Matter.js 엔진을 지정해준다.
        options: {
          // 커스텀 옵션들을 설정해준다.
          width: container.offsetWidth,
          height: container.offsetHeight,
          wireframes: false, //wireframe 여부
          background: "#eee7e0",
        },
      });

      // 📕경계 벽 생성하는 부분 (순서대로 왼쪽, 오른쪽, 아래이다. isStatic은 바디를 정적으로 만들어 물리 시뮬레이션에 영향을 주지 않도록 한다.)
      // 🧐 여기선 왜 위쪽 벽을 설정하지 않았을까? -> 떨어지는 효과를 나타내야하기 때문이다.
      const walls = [
        Bodies.rectangle(0, 0, 1, container.offsetHeight * 2, {
          isStatic: true,
        }),
        Bodies.rectangle(
          container.offsetWidth,
          0,
          1,
          container.offsetHeight * 2,
          { isStatic: true }
        ),
        Bodies.rectangle(
          0,
          container.offsetHeight,
          container.offsetWidth * 2,
          1,
          { isStatic: true }
        ),
      ];

      // 기존 코드를 살펴보면 벗어나는 부분을 계산해서 적용시켰다.
      // const walls = [
      //   Bodies.rectangle(0 - 50, 0 - 50, 1, container.offsetHeight * 2 - 50, {
      //     isStatic: true,
      //   }),
      //   Bodies.rectangle(
      //     container.offsetWidth + 50,
      //     0 - 50,
      //     1,
      //     container.offsetHeight * 2 + 50,
      //     { isStatic: true }
      //   ),
      //   Bodies.rectangle(
      //     0 - 50,
      //     container.offsetHeight + 50,
      //     container.offsetWidth * 2 + 50,
      //     1,
      //     { isStatic: true }
      //   ),
      // ];

      // 📕물리적 특성을 설정하는 객체인 physics를 정의한다.
      const physics = {
        restitution: 0.7, // 복원력 또는 탄성력 (0~1 사이에 지정해줌. 1에 가까워질 수록 충돌 후 빠르게 원래 형태로 돌아간다.)
        friction: 0.4, // 마찰 계수 (0~1 사이에 지정해줌. 1에 가까워질 수록 강한 마찰이 발생한다.)
      };

      // 도넛모양 생성하는 부분인 듯!
      const createCircle = (width, color, x, y) => {
        const outerCircle = Bodies.circle(x, y, width, {
          ...physics,
          render: {
            fillStyle: color,
          },
        });
        const innerCircle = Bodies.circle(x, y, width / 2.5, {
          ...physics,
          render: {
            fillStyle: "#eee7e0",
          },
        });

        return Body.create({
          parts: [outerCircle, innerCircle],
        });
      };

      // 소세지모양 생성하는 부분인듯!
      const createSvgElement = (path, color, scale, x, y, angle) => {
        pathElement = document.createElementNS(
          "http://www.w3.org/2000/svg",
          "path"
        );
        pathElement.setAttribute("d", path);
        const vertices = Svg.pathToVertices(pathElement, 3);
        vertices.forEach((vertical) => {
          const i = vertices.findIndex(
            (v) => v.x === vertical.x && v.y === vertical.y
          );

          if (i !== -1) {
            vertices.splice(i, 1);
          }
        });
        const body = Bodies.fromVertices(
          x,
          y,
          vertices,
          {
            ...physics,
            render: {
              fillStyle: color,
              strokeStyle: color,
              lineWidth: "1px",
            },
          },
          true
        );

        Body.scale(body, 1, 1);
        Body.setAngle(body, angle);

        return body;
      };

      // 모양 생성하는 함수를 바탕으로 요소들을 생성해주는 부분인듯

      const elements = [
        createSvgElement(curved, "#583d91", 1, 250, -400, 30),
        createSvgElement(reactangle, "#eb5c48", 1, 450, -400, 50),
        createCircle(115, "#9a3d90", 500, -400),
        createSvgElement(curved, "#583d91", 1, 700, -400, 50),
        createCircle(135, "#eb5c48", 1150, -200),
        createSvgElement(curved, "#583d91", 1, 1460, -400, 200),

        createSvgElement(curved, "#583d91", 1, 1300, -700, 300),
        createSvgElement(reactangle, "#fab71a", 1, 1600, -700, 100),

        createCircle(115, "#fab71a", 100, -900),
        createSvgElement(curved, "#eb5c48", 1, 250, -900, 250),
        createCircle(135, "#fab71a", 600, -900),
        createSvgElement(curved, "#eb5c48", 1, 1500, -900, 100),
      ];

      // 📕MouseConstraint은 마우스 입력을 기반으로 물리 시뮬레이션에 영향을 주는 제약(Constraint)을 제공한다.
      const mouseConstraint = Matter.MouseConstraint.create(engine, {
        element: container,
        constraint: {
          stiffness: 0.2, // 제어의 강도 또는 강성(stiffness)을 나타내는 값 (낮을수록 유연)
          render: {
            visible: false, // 제어 요소(마우스)의 가시성 여부
          },
        },
      });

      // 📕World.add()로 물리 엔진 세계에 다양한 물체들을 추가(배열 안에 설정해놓은 변수들을 펼침연산자로 추가한다.)
      World.add(engine.world, [...walls, mouseConstraint, ...elements]);
      // 📕Engine.run()로 Matter.js 엔진을 실행
      Engine.run(engine);

      // 📕Render.run()호출하여 렌더러 실행
      Matter.Render.run(renderer);
    </script>
  </body>
</html>
완성된 페이지
https://github.com/YeoDaSeul4355/gsap_study/blob/main/test03.html
Matter.js
Matter.js는 웹 기반 2D 물리 엔진으로, 웹 페이지나 웹 애플리케이션에서 간단한 물리 시뮬레이션을 구현하는 데 사용된다.이 엔진은 HTML5 Canvas를 기반으로 하며, 자바스크립트로 작성되어 있다. Matter.js를 사용하면 물리적인 특성을 가진 객체들을 생성하고, 그들 간의 상호작용을 구현하여 현실적인 움직임 및 충돌 효과를 만들 수 있다.
물리엔진? 그게 뭔데 ㅠㅠ
정말 처음보는 거라 먼소린지 모르겠고,.. 공식 문서도 참 불친절하구,,,,,,,,,,,,
기본 효과같은 건 구글링이나 공식문서를 보면 충분히 활용 가능하지만
저 ... path지정방법과 스크롤 이펙트가 어렵다.
그래서 오늘은 예제 코드를 뜯어보면서 사용법을 익혀볼 생각이다.(코드펜 예제를 바탕으로 주석 설명을 달았다.)
Matter.js 공식 문서
Matter.js
Matter.js is 2D rigid body physics engine for the web, using JavaScript and HTML5
brm.io
코드펜 참조
https://codepen.io/Marco-Ahlers/pen/PoxrEzm
Animation
...
codepen.io
완성된 사이트는 요기!
https://jjul-gsap-test-01.netlify.app/test03
Physics-based Falling Animation
jjul-gsap-test-01.netlify.app
html 구조
<div id="container"></div>
안믿기겠지만 이게 끝.ㅋㅋㅋㅋ
body 안에 container라는 id를 가진 div요소를 넣어준다.
css
body {
    margin: 0;
    overflow: hidden;
    display: flex;
    align-items: center;
    justify-content: center;
    background-color: #eee7e0;
    width: 100vw;
    height: 100vh;
  }

  #container {
    width: 100vw;
    height: 100vh;
  }

  svg {
    display: none;
  }
기본적인 body와 container 스타일링이다.
cdn 주소
<!-- path cdn -->
<script src="https://cdn.jsdelivr.net/npm/pathseg@1.2.1/pathseg.js"></script>
<script src="https://cdn.jsdelivr.net/npm/poly-decomp@0.3.0/build/decomp.min.js"></script>

<!-- matter.js cdn -->
<script src="https://cdnjs.cloudflare.com/ajax/libs/matter-js/0.17.1/matter.js"></script>
matter-js 주소와 나머진 path 관련된 cdn같다.
참고로 matter.js의 최신 버전은 0.19.0이다. (예제에선 더 낮은 버전을 사용.)
스크립트: 초기설정
// 📕--- 초기 세팅 ---
  const Engine = Matter.Engine,
    World = Matter.World,
    Bodies = Matter.Bodies;
  Body = Matter.Body;
  Composites = Matter.Composites;
  Common = Matter.Common;
  Vertices = Matter.Vertices;
  Svg = Matter.Svg;
  Composite = Matter.Composite;
  // --- 초기 세팅 ---
Matter.js를 쓰려면 먼저 초기 설정을 해주어야한다. 공식 문서에서 내가 원하는 효과를 찾아 github 리드미 파일에 코드가 다 나와있다.
요런식으로
원하는 효과가 있을 땐 공식 문서를 잘 살펴보고 적용해보자.
내가 봤을 때 이 예제는 concave라는 효과를 사용한 거 같다
https://github.com/liabru/matter-js/blob/master/examples/concave.js
물리엔진 생성 후 렌더링
// 📕Engine.create() 함수를 사용하여 Matter.js 엔진을 생성한다.
const engine = Engine.create();
// 📕렌더링할 컨테이너 역할 부분의 id를 가져온다.(getElementById)
const container = document.getElementById("container");

// 📕Matter.Render.create() 함수를 사용하여 시각적인 렌더링을 담당하는 객체를 생성한다.
const renderer = Matter.Render.create({
element: container, // 렌더러가 그릴 HTML요소를 지정해준다.
engine: engine, // 렌더러에 사용될 Matter.js 엔진을 지정해준다.
options: {
  // 커스텀 옵션들을 설정해준다.
  width: container.offsetWidth,
  height: container.offsetHeight,
  wireframes: false, //wireframe 여부
  background: "#eee7e0",
},
});
벽 설정
// 📕경계 벽 생성하는 부분 (순서대로 왼쪽, 오른쪽, 아래이다. isStatic은 바디를 정적으로 만들어 물리 시뮬레이션에 영향을 주지 않도록 한다.)
// 🧐 여기선 왜 위쪽 벽을 설정하지 않았을까? -> 떨어지는 효과를 나타내야하기 때문이다.
const walls = [
    Bodies.rectangle(0, 0, 1, container.offsetHeight * 2, {
      isStatic: true,
    }),
    Bodies.rectangle(
      container.offsetWidth,
      0,
      1,
      container.offsetHeight * 2,
      { isStatic: true }
    ),
    Bodies.rectangle(
      0,
      container.offsetHeight,
      container.offsetWidth * 2,
      1,
      { isStatic: true }
    ),
];
물리 설정
// 📕물리적 특성을 설정하는 객체인 physics를 정의한다.
const physics = {
  restitution: 0.7, // 복원력 또는 탄성력 (0~1 사이에 지정해줌. 1에 가까워질 수록 충돌 후 빠르게 원래 형태로 돌아간다.)
  friction: 0.4, // 마찰 계수 (0~1 사이에 지정해줌. 1에 가까워질 수록 강한 마찰이 발생한다.)
};
svg 모양 설정
// 도넛모양 생성하는 부분인 듯!
const createCircle = (width, color, x, y) => {
    const outerCircle = Bodies.circle(x, y, width, {
      ...physics,
      render: {
        fillStyle: color,
      },
    });
    const innerCircle = Bodies.circle(x, y, width / 2.5, {
      ...physics,
      render: {
        fillStyle: "#eee7e0",
      },
    });

    return Body.create({
      parts: [outerCircle, innerCircle],
    });
};

// 소세지모양 생성하는 부분인듯!
const createSvgElement = (path, color, scale, x, y, angle) => {
    pathElement = document.createElementNS(
      "http://www.w3.org/2000/svg",
      "path"
    );
	pathElement.setAttribute("d", path);
	const vertices = Svg.pathToVertices(pathElement, 3);
	vertices.forEach((vertical) => {
          const i = vertices.findIndex(
            (v) => v.x === vertical.x && v.y === vertical.y
          );

          if (i !== -1) {
            vertices.splice(i, 1);
        }
    });
    const body = Bodies.fromVertices(
      x,
      y,
      vertices,
      {
        ...physics,
        render: {
          fillStyle: color,
          strokeStyle: color,
          lineWidth: "1px",
        },
      },
      true
    );

	Body.scale(body, 1, 1);
	Body.setAngle(body, angle);

	return body;
};

// 모양 생성하는 함수를 바탕으로 요소들을 생성해주는 부분인듯

const elements = [
    createSvgElement(curved, "#583d91", 1, 250, -400, 30),
    createSvgElement(reactangle, "#eb5c48", 1, 450, -400, 50),
    createCircle(115, "#9a3d90", 500, -400),
    createSvgElement(curved, "#583d91", 1, 700, -400, 50),
    createCircle(135, "#eb5c48", 1150, -200),
    createSvgElement(curved, "#583d91", 1, 1460, -400, 200),

    createSvgElement(curved, "#583d91", 1, 1300, -700, 300),
    createSvgElement(reactangle, "#fab71a", 1, 1600, -700, 100),

    createCircle(115, "#fab71a", 100, -900),
    createSvgElement(curved, "#eb5c48", 1, 250, -900, 250),
    createCircle(135, "#fab71a", 600, -900),
    createSvgElement(curved, "#eb5c48", 1, 1500, -900, 100),
];
마우스 감지 이벤트
// 📕MouseConstraint은 마우스 입력을 기반으로 물리 시뮬레이션에 영향을 주는 제약(Constraint)을 제공한다.
const mouseConstraint = Matter.MouseConstraint.create(engine, {
    element: container,
    constraint: {
      stiffness: 0.2, // 제어의 강도 또는 강성(stiffness)을 나타내는 값 (낮을수록 유연)
      render: {
        visible: false, // 제어 요소(마우스)의 가시성 여부
      },
    },
});
물리엔진 world에 추가 후 렌더링하기
// 📕World.add()로 물리 엔진 세계에 다양한 물체들을 추가(배열 안에 설정해놓은 변수들을 펼침연산자로 추가한다.)
World.add(engine.world, [...walls, mouseConstraint, ...elements]);
// 📕Engine.run()로 Matter.js 엔진을 실행
Engine.run(engine);

// 📕Render.run()호출하여 렌더러 실행
Matter.Render.run(renderer);
거의 웬만한 설명은 주석에 달아놓았으므로 궁금한 부분은 gpt 찬스 쓰시면 될 듯 싶슴당. (귀찮아서 그런거 아님)
전체 코드
<!DOCTYPE html>
<html lang="en">
  <head>
    <meta charset="UTF-8" />
    <meta name="viewport" content="width=device-width, initial-scale=1.0" />
    <title>Physics-based Falling Animation</title>
    <style>
      body {
        margin: 0;
        overflow: hidden;
        display: flex;
        align-items: center;
        justify-content: center;
        background-color: #eee7e0;
        width: 100vw;
        height: 100vh;
      }

      #container {
        width: 100vw;
        height: 100vh;
      }

      svg {
        display: none;
      }
    </style>
  </head>

  <body>
    <div id="container"></div>

    <!-- path cdn -->
    <script src="https://cdn.jsdelivr.net/npm/pathseg@1.2.1/pathseg.js"></script>
    <script src="https://cdn.jsdelivr.net/npm/poly-decomp@0.3.0/build/decomp.min.js"></script>

    <!-- matter.js cdn -->
    <script src="https://cdnjs.cloudflare.com/ajax/libs/matter-js/0.17.1/matter.js"></script>
    <script>
      // 📕보통 matter.js에서 패스를 지정할 때 쓴다.
      const reactangle =
        "m.26,274.72c-1.79-20.16,5.77-40.86,22.2-55.17L256.07,16.09c27.25-23.73,68.58-20.88,92.31,6.37,23.73,27.25,20.88,68.58-6.37,92.31l-233.61,203.46c-27.25,23.73-68.58,20.88-92.31-6.37-9.42-10.82-14.66-23.86-15.83-37.14Z";
      const curved =
        "m341.46,31.89c14.51,28.65,3.05,63.65-25.6,78.16-3.42,1.73-34.78,17.16-83.49,26.15-28.57,5.27-57.68,7.34-86.51,6.14-36.13-1.5-71.89-8.14-106.28-19.74C9.15,112.33-7.2,79.34,3.07,48.9,13.33,18.47,46.33,2.12,76.77,12.39c101.89,34.37,185.72-5.68,186.54-6.1,28.65-14.51,63.65-3.05,78.16,25.6Z";

      // 📕--- 초기 세팅 ---
      const Engine = Matter.Engine,
        World = Matter.World,
        Bodies = Matter.Bodies;
      Body = Matter.Body;
      Composites = Matter.Composites;
      Common = Matter.Common;
      Vertices = Matter.Vertices;
      Svg = Matter.Svg;
      Composite = Matter.Composite;
      // --- 초기 세팅 ---

      // 📕Engine.create() 함수를 사용하여 Matter.js 엔진을 생성한다.
      const engine = Engine.create();
      // 📕렌더링할 컨테이너 역할 부분의 id를 가져온다.(getElementById)
      const container = document.getElementById("container");

      // 📕Matter.Render.create() 함수를 사용하여 시각적인 렌더링을 담당하는 객체를 생성한다.
      const renderer = Matter.Render.create({
        element: container, // 렌더러가 그릴 HTML요소를 지정해준다.
        engine: engine, // 렌더러에 사용될 Matter.js 엔진을 지정해준다.
        options: {
          // 커스텀 옵션들을 설정해준다.
          width: container.offsetWidth,
          height: container.offsetHeight,
          wireframes: false, //wireframe 여부
          background: "#eee7e0",
        },
      });

      // 📕경계 벽 생성하는 부분 (순서대로 왼쪽, 오른쪽, 아래이다. isStatic은 바디를 정적으로 만들어 물리 시뮬레이션에 영향을 주지 않도록 한다.)
      // 🧐 여기선 왜 위쪽 벽을 설정하지 않았을까? -> 떨어지는 효과를 나타내야하기 때문이다.
      const walls = [
        Bodies.rectangle(0, 0, 1, container.offsetHeight * 2, {
          isStatic: true,
        }),
        Bodies.rectangle(
          container.offsetWidth,
          0,
          1,
          container.offsetHeight * 2,
          { isStatic: true }
        ),
        Bodies.rectangle(
          0,
          container.offsetHeight,
          container.offsetWidth * 2,
          1,
          { isStatic: true }
        ),
      ];

      // 기존 코드를 살펴보면 벗어나는 부분을 계산해서 적용시켰다.
      // const walls = [
      //   Bodies.rectangle(0 - 50, 0 - 50, 1, container.offsetHeight * 2 - 50, {
      //     isStatic: true,
      //   }),
      //   Bodies.rectangle(
      //     container.offsetWidth + 50,
      //     0 - 50,
      //     1,
      //     container.offsetHeight * 2 + 50,
      //     { isStatic: true }
      //   ),
      //   Bodies.rectangle(
      //     0 - 50,
      //     container.offsetHeight + 50,
      //     container.offsetWidth * 2 + 50,
      //     1,
      //     { isStatic: true }
      //   ),
      // ];

      // 📕물리적 특성을 설정하는 객체인 physics를 정의한다.
      const physics = {
        restitution: 0.7, // 복원력 또는 탄성력 (0~1 사이에 지정해줌. 1에 가까워질 수록 충돌 후 빠르게 원래 형태로 돌아간다.)
        friction: 0.4, // 마찰 계수 (0~1 사이에 지정해줌. 1에 가까워질 수록 강한 마찰이 발생한다.)
      };

      // 도넛모양 생성하는 부분인 듯!
      const createCircle = (width, color, x, y) => {
        const outerCircle = Bodies.circle(x, y, width, {
          ...physics,
          render: {
            fillStyle: color,
          },
        });
        const innerCircle = Bodies.circle(x, y, width / 2.5, {
          ...physics,
          render: {
            fillStyle: "#eee7e0",
          },
        });

        return Body.create({
          parts: [outerCircle, innerCircle],
        });
      };

      // 소세지모양 생성하는 부분인듯!
      const createSvgElement = (path, color, scale, x, y, angle) => {
        pathElement = document.createElementNS(
          "http://www.w3.org/2000/svg",
          "path"
        );
        pathElement.setAttribute("d", path);
        const vertices = Svg.pathToVertices(pathElement, 3);
        vertices.forEach((vertical) => {
          const i = vertices.findIndex(
            (v) => v.x === vertical.x && v.y === vertical.y
          );

          if (i !== -1) {
            vertices.splice(i, 1);
          }
        });
        const body = Bodies.fromVertices(
          x,
          y,
          vertices,
          {
            ...physics,
            render: {
              fillStyle: color,
              strokeStyle: color,
              lineWidth: "1px",
            },
          },
          true
        );

        Body.scale(body, 1, 1);
        Body.setAngle(body, angle);

        return body;
      };

      // 모양 생성하는 함수를 바탕으로 요소들을 생성해주는 부분인듯

      const elements = [
        createSvgElement(curved, "#583d91", 1, 250, -400, 30),
        createSvgElement(reactangle, "#eb5c48", 1, 450, -400, 50),
        createCircle(115, "#9a3d90", 500, -400),
        createSvgElement(curved, "#583d91", 1, 700, -400, 50),
        createCircle(135, "#eb5c48", 1150, -200),
        createSvgElement(curved, "#583d91", 1, 1460, -400, 200),

        createSvgElement(curved, "#583d91", 1, 1300, -700, 300),
        createSvgElement(reactangle, "#fab71a", 1, 1600, -700, 100),

        createCircle(115, "#fab71a", 100, -900),
        createSvgElement(curved, "#eb5c48", 1, 250, -900, 250),
        createCircle(135, "#fab71a", 600, -900),
        createSvgElement(curved, "#eb5c48", 1, 1500, -900, 100),
      ];

      // 📕MouseConstraint은 마우스 입력을 기반으로 물리 시뮬레이션에 영향을 주는 제약(Constraint)을 제공한다.
      const mouseConstraint = Matter.MouseConstraint.create(engine, {
        element: container,
        constraint: {
          stiffness: 0.2, // 제어의 강도 또는 강성(stiffness)을 나타내는 값 (낮을수록 유연)
          render: {
            visible: false, // 제어 요소(마우스)의 가시성 여부
          },
        },
      });

      // 📕World.add()로 물리 엔진 세계에 다양한 물체들을 추가(배열 안에 설정해놓은 변수들을 펼침연산자로 추가한다.)
      World.add(engine.world, [...walls, mouseConstraint, ...elements]);
      // 📕Engine.run()로 Matter.js 엔진을 실행
      Engine.run(engine);

      // 📕Render.run()호출하여 렌더러 실행
      Matter.Render.run(renderer);
    </script>
  </body>
</html>
완성된 페이지
https://github.com/YeoDaSeul4355/gsap_study/blob/main/test03.html